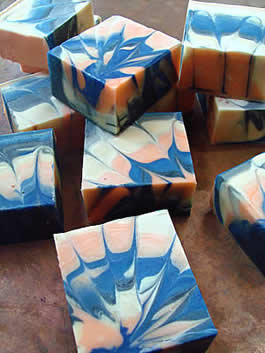
This is a very simple swirl technique with dramatic end results. Make sure you have some practice making cold process soap before trying this, so that you are familiar with a light trace versus a heavy trace. It is important to keep the batter nice and thin during the entire process.
Gather your materials to make 3 lbs of soap:
9 Bar Birchwood Mold
12 oz Coconut Oil
12 oz Palm Oil
12 oz Olive Oil
6 oz Aloe Vera Liquid
6 oz Distilled Water
5.2 oz Lye
1/4 tsp. Ultramarine Blue Pigment
1/4 tsp. Activated Charcoal
1/2 tsp. Tangerine Wow! Pigment
2 oz Litsea Essential Oil
(It is up to you whether or not you use the dividers in your mold. I cut my bars by hand the next day).
Before adding the lye to the oils, pour about 1/2 ounce of oil from your batch into three small containers and stir in each pigment in each container. By doing so, you are eliminating clumps of pigment by breaking it down in advance. Then, mix the lye solution into the oils and reach a light trace. Keep in mind, when you use aloe vera liquid as part of your lye solution, it will turn an orange color and emit a light odor that disappears after the soap sets up.
At light trace, stir in the fragrance and split the soap into four equal parts by pouring into the color containers and leaving some neutral in the pot (1 part tangerine, 1 part charcoal, 1 part blue, and 1 part neutral). Stir the colors in by hand. You should not stick blend after reaching trace because it will only make your soap thicker. Aren’t you glad you broke down your pigments first?
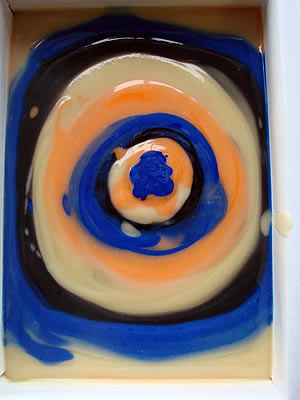
Now for the fun part! Alternate pouring each color directly in the middle of your mold. Count “1…2…3…” as you pour to keep an even amount of soap distributed with each color. Shake and pound the mold on the table to even out the surface. When you are out of color, you will have created a bulls-eye pattern like this:
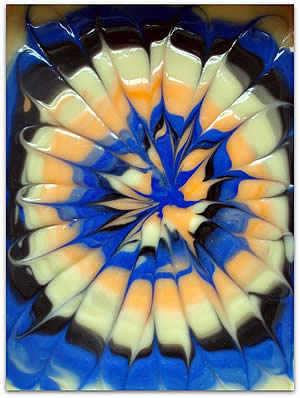
Using a bamboo skewer, start in the middle and drag the colors out to the edge of the mold. Do not lift out the skewer until you are have gone around the entire mold. The less you manipulate the swirl the better; you don’t want to overdo it and make one big blended blur of colors. Stop at the first “Wow! My swirl looks amazing!”
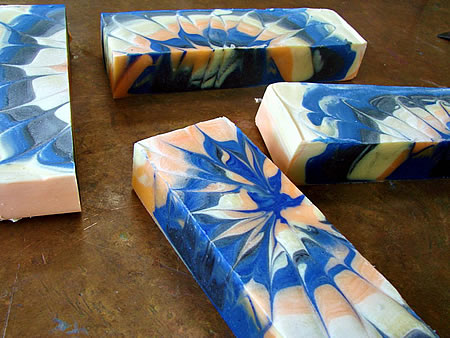
Let the soap harden over night and cut it the next day. Try different colors and see what you get! I went with a dark, medium, and light color for the most contrast. We’d love to see your results.


